As useful as ssh and command-line (CLI) tools are when using a Linux/Ubuntu system remotely, sometimes it simply isn’t enough. And I dare say, sometimes it’s better to use a graphical tool to do something than it is to use the CLI alternative- parted/gparted: I’m looking at you!
Sometimes you may even want to use a full graphical desktop remotely (audible gasps!). This can be handy if you’re developing a desktop system on a remote server or virtual machine and want to experience the system the same way as the end user. I’ve found it useful when developing Linux code from a Windows desktop, and want to run a full development environment remotely. Setting up a remote session too, I’ve found, resolves some quirky display issues when using a proprietary program with a GUI remotely.
In this tutorial I’ll show you how to tunnel X11 through ssh to both a computer running Windows with Putty and VcXsrv and a Linux computer with Xnest. I will show you how to tunnel and entire desktop session or an individual program.
Before we begin, configure the remote server:
I’m assuming that port 22 is open on your remote server and you are capable of logging into the server with ssh.
Edit the file /etc/ssh/sshd_config (with sudo if necessary)
sudo vi /etc/ssh/sshd_config
And ensure that X11Forwarding yes is set and set AddressFamily inet:
X11Forwarding yes
...
AddressFamily inet
WARNING: Setting AddressFamily to inet will force ssh to only use ipv4 addresses. If you use IPv6, then this tutorial is not for you!
Next, install lxde – a lightweight desktop environment:
sudo apt install lxde lxdesession
Generally, I prefer using Linux Mint with Cinnamon, but LXDE provides a nice environment that does not use a lot of network bandwidth. There are alternatives through, and I do suggest you look into them if you’re interested.
Finally, restart ssh, log out and log back into your server to make sure everything is working.
sudo service ssh restart;exit
Lets start with the easier option first: Linux:
Running a single program remotely:
At this point your remote server is already configured to allow ssh +X11 forwarding. if you log into your remote server and run a graphical program (assuming it is installed) the program will magically appear in front of you. Be aware that it will take over your terminal unless you push it to the background with ampersand (&), for instance:
user@RemoteServer$ gparted &
If you experience trouble at this point, it is worth connecting with ssh using the -vv -X flags to see the error messages.
Running an entire session remotely:
On your Linux/Ubuntu/Mint Desktop, open a terminal and install xnest:
sudo apt install xnest
Xnest is both an X11 server and X11 client. There is a lot written about it, so again, google is your friend if you want more information. Once insalled, create a new script called remote_session.sh, make it executable and edit it:
touch remote_session.sh;chmod +x remote_session.sh;vi remote_session.sh
Add the following, modified to suit your personal circumstances:
#!/bin/bash

Xnest :3 -ac -geometry 1500x990 &
export DISPLAY=:3
ssh HOSTNAME_OF_REMOTE_SERVER lxsession
The bash script is very simple and is in three parts.
The first line calls Xnest, starting a new X11 server, fully windowed with the dimensions 1500×900, you will need to adjust this to your preferred resolution. Then export will tell all your graphical programs to use Xnest, rather than your original X11 server. This will only apply to programs run from your current terminal. Finally, the last command, ssh will connect remotely to your server and run lxsession, the lxde session manager. If it is all successful, you should have a new window appear with a full desktop session appearing in it.
Run the script by typing at the terminal:
./remote_session.sh
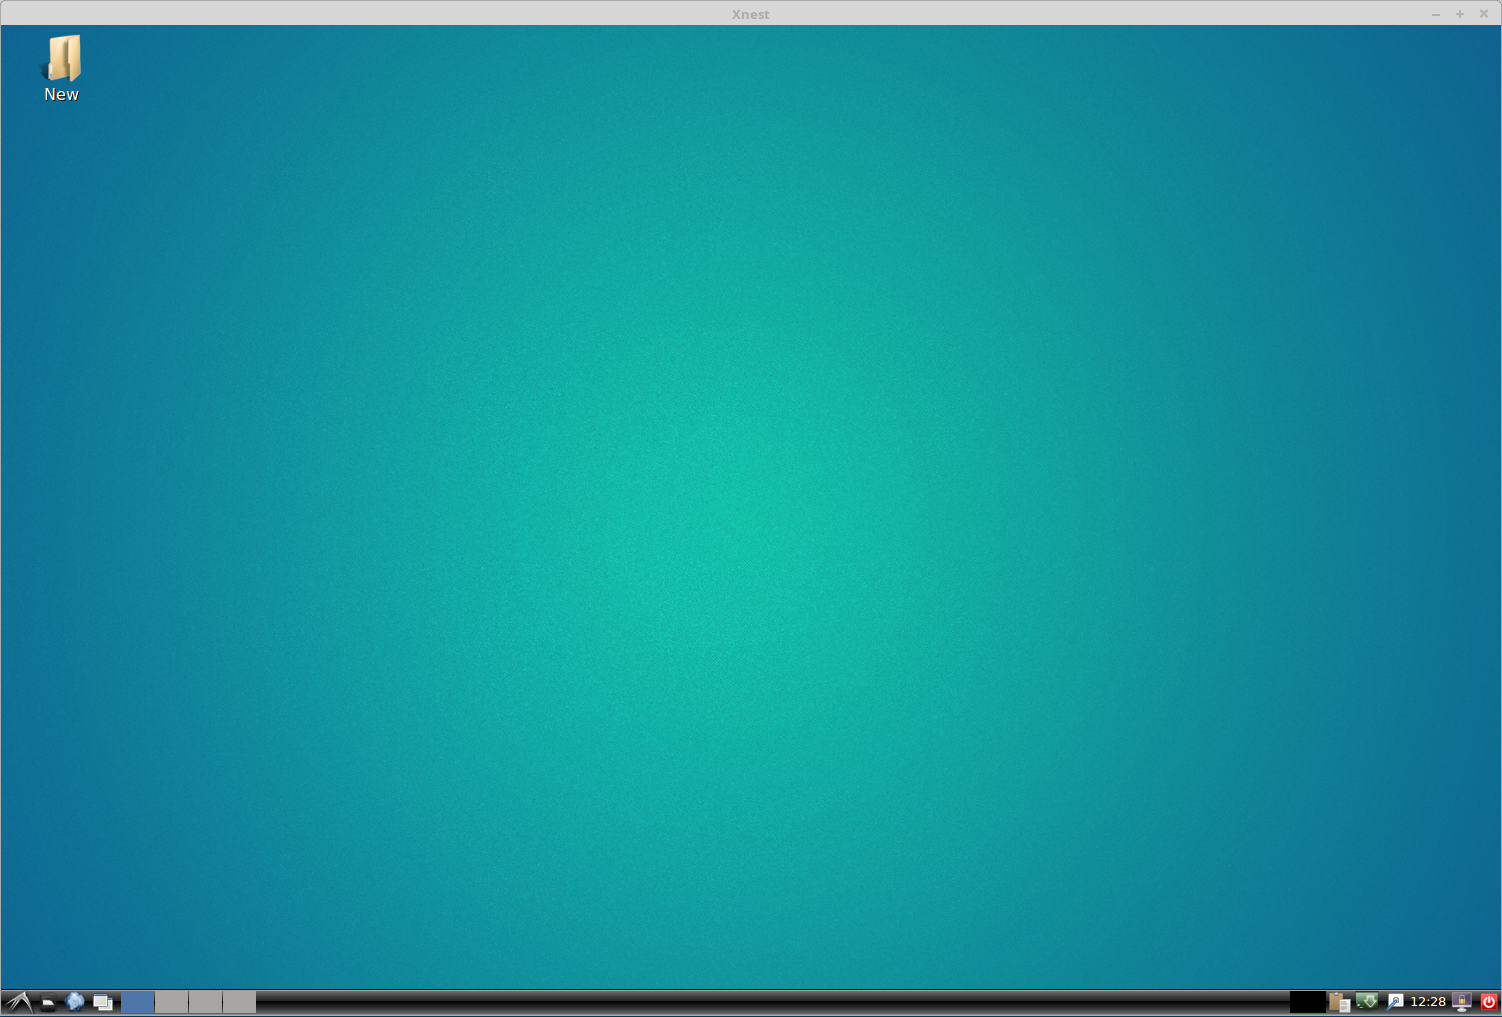
Lxde Session running in Xnest
Your session may not have the nice background picture, which i set to Greenish_by_EstebanMitnick.jpg in /usr/share/backgrounds.
Once finished working in the remote session, simply close your programs like normal, and close the Xnest window.
Connecting From Windows:
The process is very similar to the above. I’ve assumed you’ve installed VcXsrv and are somewhat familiar with Putty.
Running a Single Program:
To run single program so that it integrates into your Windows environment, launch the VcXsrv program by double-clicking its icon on the desktop. Its icon will appear in your notifications area. Open putty, and ensure that Enable X11 forwarding is ticked in the putty options before connecting to your box:
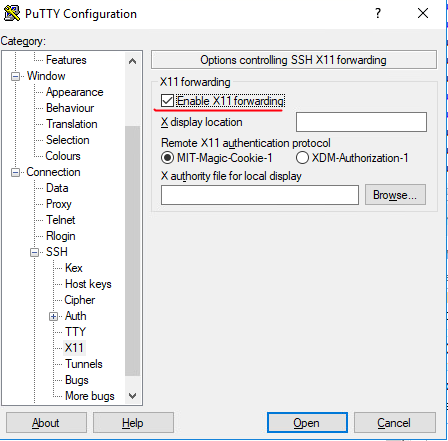
Tick the box!
Once logged in, run your graphical program via putty, and it should appear magically in front of you! (This is my preferred way to access virt-manager from a windows computer).
Running an Entire Session:
The process to connect with putty is the same, except that instead of running a graphical program, say gparted, you start a session manager, lxsession, for instance.
Additionally, you will need to use Xlaunch which will ask you to configure your X11 server.
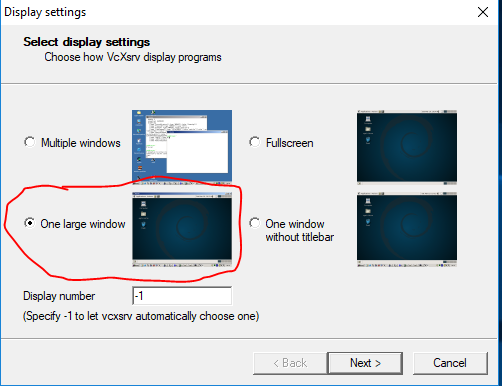
Select the One Large Window option when prompted.
Most of the options that XLaunch presents can be clicked through without modification, just ensure you choose ‘One Large Window’.
Once you’ve run VcXsrv as outlined above, log in with putty and run your session manager: lxsession and boom! You should have an entire remote session running on your windows computer.
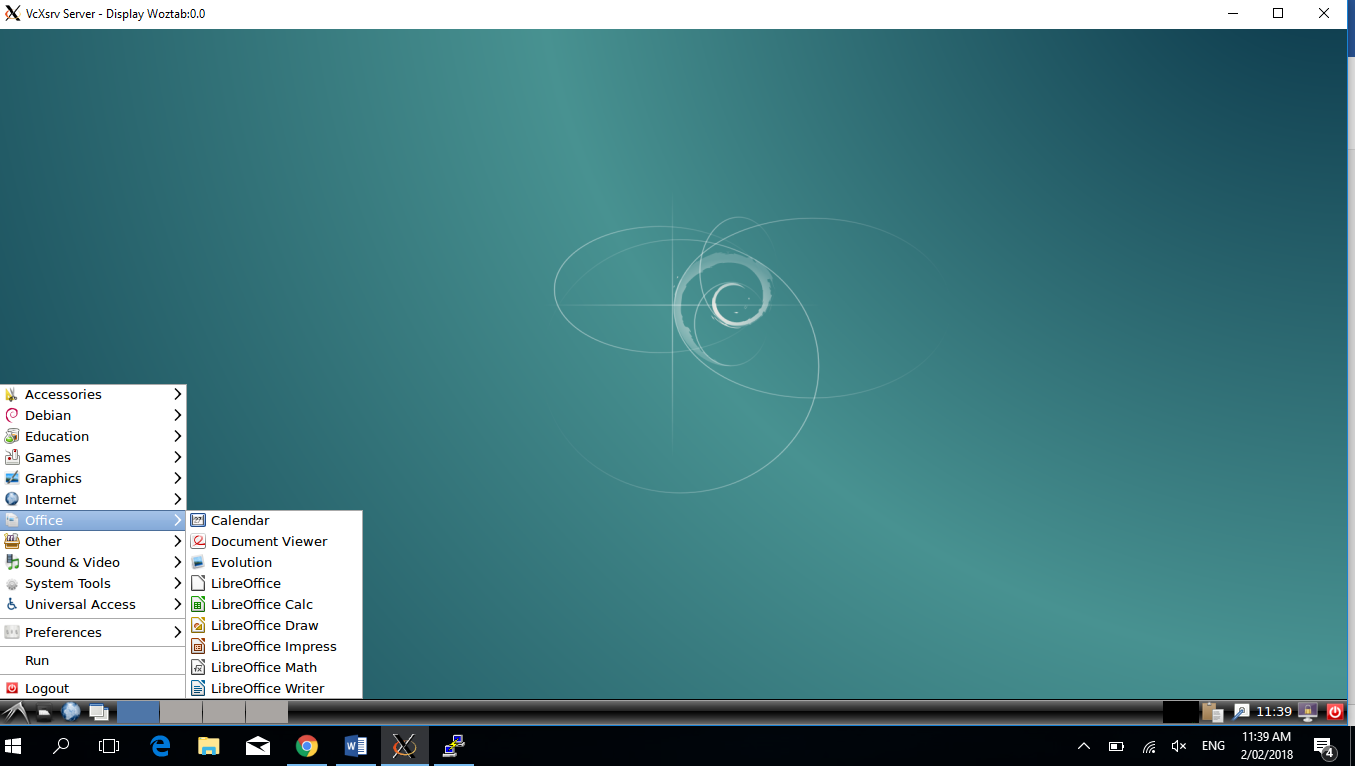
Remote Linux on Windows!