Configuring a Raspberry Pi 2 with a Huwei K4203 USB 3G Modem

Background/Overview:

My Wife and I like to travel overseas and we both have multiple devices when we travel. Over the years we’ve tried different solutions. From buying ‘travel’ sims before we leave that end up costing a fortune, to just enabling roaming on our phones and again, paying heavily for international data roaming.

After doing a little research on the best deal and wanting a flexible option, I bought a 3G dongle from Vodafone. A Huawei K4204 to be precise. My goal is to create a Raspberry Pi that will connect to the hotel WiFi when available and will have it’s own AP running on a different channel so that our devices only have to remember one Access Point.  This will circumvent certain hotels that only allow you to connect a single device to their network. It will also mean that if we have a Google Chromecast I only have to program a single network into it and use it when we travel. The Raspberry Pi will have a 3G data connection when no Hotel WiFi is available or we’re out and about. When we arrive at our destination (the UK) we will buy a local sim with local (read: cheap) data.

The below steps are how I achieved the above:

Part 1: Initial Setup

Install Raspbian in any way you prefer. I’ve installed the lite version that has no gui.

Use dd to write to the disk, in my case the microSD card was at /dev/sdd:

sudo dd if=2017-04-10-raspbian-jessie-lite.img of=/dev/sdd bs=2M

log in as pi, password: raspberry

add a new user and add the user to the sudo group so you can edit system files:

sudo adduser wargus;sudo usermod -a -G sudo USERNAME

log in as your new user, remove pi

sudo deluser pi

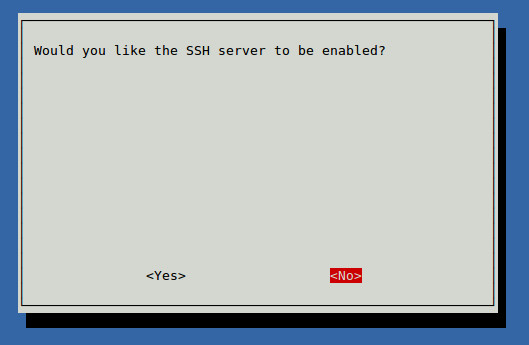
enable ssh by default using raspi-config

sudo raspi-config

Under Interfacing Options, 2, Enable SSH:

Check the IP address of the raspberry pi, it should be set to dhcp automatically.

ifconfig 
eth0 Link encap:Ethernet HWaddr 00:00:00:00:00:00 
 inet addr:10.60.204.182 Bcast:10.60.204.255 Mask:255.255.255.128
 UP BROADCAST RUNNING MULTICAST MTU:1500 Metric:1
 RX packets:7511 errors:0 dropped:12 overruns:0 frame:0
 TX packets:2759 errors:0 dropped:0 overruns:0 carrier:0
 collisions:0 txqueuelen:1000 
 RX bytes:669438 (653.7 KiB) TX bytes:604742 (590.5 KiB)

At this point you can disconnect the terminal and use SSH to connect to your raspberry device.

Configuring usb_modeswitch

I used this site as a reference. It was mostly right for me, although I did have to do a lot troubleshooting before I had it completely right.

cd /tmp
tar -xzvf /usr/share/usb_modeswitch/configPack.tar.gz 19d2\:1f1c

Will create a new file in the tmp directory it will need to be further edited to look like this:

# Vodafone / Huawei K4203
DefaultVendor=0x12d1
DefaultProduct=0x1f1c
TargetVendor=0x12d1
TargetProductList="157a,1590"
HuaweiNewMode=1

Copy or move that file to /etc/usb_modeswitch.d/

At this point with a fresh install, you should be able to plug in the dongle. Switch the usb mode by running :

sudo usb_modeswitch -c /etc/usb_modeswitch.d/12d1\:1f1c

Check the switch by using lsusb, as the output suggests.

lsusb
Bus 001 Device 007: ID 12d1:1590 Huawei Technologies Co., Ltd. 
Bus 001 Device 004: ID 0bda:8178 Realtek Semiconductor Corp. RTL8192CU 802.11n WLAN Adapter
Bus 001 Device 003: ID 0424:ec00 Standard Microsystems Corp. SMSC9512/9514 Fast Ethernet Adapter
Bus 001 Device 002: ID 0424:9514 Standard Microsystems Corp. 
Bus 001 Device 001: ID 1d6b:0002 Linux Foundation 2.0 root hub

In my setup, the dongle flashed green, flashed blue, then goes solid blue. A quick check of ifconfig at this point shows that the dongle presents itself as a new Ethernet adaptor:

ifconfig 
...
eth1 Link encap:Ethernet HWaddr 00:00:00:00:00:00 
inet addr:192.168.9.100 Bcast:192.168.9.255 Mask:255.255.255.0
UP BROADCAST RUNNING MULTICAST MTU:1500 Metric:1
RX packets:55 errors:0 dropped:0 overruns:0 frame:0
TX packets:38 errors:0 dropped:0 overruns:0 carrier:0
collisions:0 txqueuelen:1000 
RX bytes:16310 (15.9 KiB) TX bytes:7400 (7.2 KiB)

The dongle automagically configures itself and connects to the internet. 🙂 Remember that at this point to connect to the internet will require you to manually set the dongle to the correct mode.

Test the connection by pinging over the interface:

ping www.google.com -I eth1
PING www.google.com (203.219.197.210) from 192.168.9.100 eth1: 56(84) bytes of data.
64 bytes from cache.google.com (203.219.197.210): icmp_seq=1 ttl=55 time=2254 ms
64 bytes from cache.google.com (203.219.197.210): icmp_seq=2 ttl=55 time=1248 ms
64 bytes from cache.google.com (203.219.197.210): icmp_seq=3 ttl=55 time=248 ms

ping www.google.com -I eth0
PING www.google.com (203.219.197.245) from 10.60.204.182 eth0: 56(84) bytes of data.
64 bytes from cache.google.com (203.219.197.245): icmp_seq=1 ttl=60 time=1.85 ms
64 bytes from cache.google.com (203.219.197.245): icmp_seq=2 ttl=60 time=1.50 ms
64 bytes from cache.google.com (203.219.197.245): icmp_seq=3 ttl=60 time=2.33 ms

Part 2: Routing Configuration

At this point, we have a very smart little independently internet connected Raspberry Pi. What we want to do next is a little more complicated. We’re going to configure it to be an access point that will hand out IP addresses and handle NAT. unfortunately it won’t be smart enough to switch between wifi and 3G automatically however you can connect and do that yourself. 😉

Linux by default does not know that it is a router. We need to enable that functionality and, while we’re there, disable IPv6 (which is something of a security concern).

Edit /etc/sysctl.conf with your favourite editor and uncomment the line:

net.ipv4.ip_forward=1

Add the following lines:

net.ipv6.conf.all.disable_ipv6=1
net.ipv6.conf.default.disable_ipv6=1

Then run the following command to make the changes apply:

sudo sysctl -p

Install hostapd and configure your wifi dongle to be an access point:

sudo apt-get install hostapd -y

Edit the primary wifi dongle to be an access point by editing /etc/hostapd.conf

channel=3
country_code=AU
hw_mode=g
interface=wlan0
ssid=SSIDNAME
wpa=2
wpa_key_mgmt= WPA-PSK WPA-EAP WPA-PSK-SHA256 WPA-EAP-SHA256
wpa_passphrase=PASSPHRASE

You will need to edit the above to suit. Be sure to check what channels are being used and pick one that does not have too much interference.

Now edit the /etc/network/interfaces file and change wlan0’s settings:

auto wlan0
allow-hotplug wlan0
iface wlan0 inet static
hostapd /etc/hostapd/hostapd.conf
address 10.60.205.129
netmask 255.255.255.128
broadcast 10.60.205.255
dns-nameservers 8.8.8.8 8.8.4.4

To save heartache later, edit the default settings for eth0 to:

iface eth0 inet dhcp

To explain the above: I’ve gone with a small 10.60.205.128/25 IP range and I’ve set google’s name servers to be my defaults. It is necessary to change eth0’s settings as it will fail to come up when we change some service settings below.

Finally, setup a dhcp server. I tend to prefer a more robust dhcp server:

sudo apt-get install isc-dhcp-server

Configure it to only operate on the wlan0 interface by editing /etc/default/isc-dhcp-server and changing the line INTERFACES=”” to

INTERFACES="wlan0"

Edit the configuration file for the dhcp server in /etc/dhcp/dhcpd.conf Change various options at the top to match your own configuration, the important points to recognise are:

# option definitions common to all supported networks...
option domain-name "yourdomain.local";
option domain-name-servers 8.8.8.8, 8.8.4.4;

subnet 10.60.205.128 netmask 255.255.255.128 {
range 10.60.205.150 10.60.205.190;
option routers 10.60.205.129;
option broadcast-address 10.60.205.255;
}

This will create a range of IP addresses to assign to devices as needed from 150 to 190.  We still won’t have routing yet, but we’re nearly there! Enable the dhcp service:

sudo systemctl enable isc-dhcp-server.service

Start the dhcp server:

sudo service isc-dhcp-server start

It should be safe to start the service now, and test  everything be restarting it. if you connect a device to the network it will be able to get an IP address, it just won’t have any internet access.

If you have another wifi dongle, as I do, it can also be configured to be a client to another wireless network. This is handy if your hotel only allows one device to be connected to their wifi and you have many devices. Connect the Raspberry Pi to their network and have it do NAT to your devices.

The Configuration at home may be different to the hotel, which is why I’ve included the note in the configuration below to remind me where to look for information. Remember, if you need to find more information you can always use the 3G dongle to get access to the internet 🙂

#Configure the roaming interface
#Use 'sudo iwlist scan' to find an AP to join
auto wlan1
allow-hotplug wlan1
iface wlan1 inet dhcp
wpa-ssid SSID_OF_NETWORK
wpa-psk PASSWORD

The Final Steps: Routing and Firewalling.

At this point we can write a simple script called firewall to allow routing. It can be placed in /etc/init.d/.

#!/bin/bash

# Iptables Location
IPTABLES="/sbin/iptables"
#Load Modules#

##########################################################
#
# Don't Touch anything below this line!
#

case "$1" in start)

echo "Starting Firewall Services"
echo "Firewall: Configuring firewall rules using iptables"

#BEGIN FIREWALL ROUTING HERE

#We want the 3G router to start when the firewall does. So we use usb switch here:
usb_modeswitch -c /etc/usb_modeswitch.d/12d1\:1f1c

#Flush Routing Table
$IPTABLES -F
$IPTABLES -t nat -F
$IPTABLES -t mangle -F
$IPTABLES -t mangle -X
$IPTABLES -X

# default policy
 $IPTABLES -P INPUT ACCEPT
 $IPTABLES -P FORWARD ACCEPT
 $IPTABLES -P OUTPUT ACCEPT

# allow established,related
 $IPTABLES -A INPUT -m state --state ESTABLISHED,RELATED -j ACCEPT
 $IPTABLES -A FORWARD -m state --state ESTABLISHED,RELATED -j ACCEPT

# Masquerade over both routes
 $IPTABLES -t nat -A POSTROUTING -o eth1 -j MASQUERADE
 $IPTABLES -t nat -A POSTROUTING -o wlan1 -j MASQUERADE
#END FIREWALL ROUTING HERE

touch /var/lock/firewall
;;
status)
 if [ -f /var/lock/firewall ]; then
 echo "Firewall started and configured"
 else
 echo "Firewall stopped"
 fi
 exit 0
 ;;

restart|reload)
 $0 stop
 $0 start
 ;;

stop)
 echo "Shutting down Firewall services"

#Flush Routing Table
$IPTABLES -F
$IPTABLES -t nat -F
$IPTABLES -t mangle -F
$IPTABLES -t mangle -X
$IPTABLES -X

# default policy
 $IPTABLES -P INPUT ACCEPT
 $IPTABLES -P FORWARD ACCEPT
 $IPTABLES -P OUTPUT ACCEPT

 rm -f /var/lock/firewall
 echo
 ;;
 *)
 echo "Usage: /etc/init.d/firewall {start|stop|status|restart|reload}"
 exit 1
esac
exit 0

I’ve noticed that by default the router will route traffic over the wlan1 before eth1, even if eth1 exists and has internet access. This is useful as it means that we can have a single firewall/routing script for both connections. It will fail-over to the 3G dongle when no appropriate WiFi AP can be found.

Install the script with:

sudo update-rc.d firewall defaults

At this point I was able to power down the Raspberry Pi. On coming back online the two dongles didn’t work, but the 3G dongle did. As hotplug is enabled on those two wifi dongles, removing and re-inserting them got them working again. I was then able to connect to the internet (and the Pi) over WiFi. Removing the dongle connecting to my home network immediately failed over to the 3G dongle.

Which brings us to the end!


Monitoring Plex with Plexpy on Ubuntu 16.04

Background:

Plex, for a multi-user multi-media system, lacks detailed logging and monitoring. A colleague recently pointed out to me that another system, PlexPY exists to fill that gap. This blog post will walk through the steps I took to integrate the system into my reverse proxy and setup init scripts.
Plexpy itself, has quite good documentation here (for initial setup) and here (for creating system init scripts).

Creating a new service:

This is straightforward, and can be done by following the documentation above. No changes were necessary to have it running on Ubuntu 16.04.

  1. Create the user to run the service:
    sudo adduser --system --no-create-home plexpy
  2. Change the ownership of the file structure to allow the new user to modify the files:
    sudo chown plexpy:nogroup -R /opt/plexpy
  3. Create the init script:
    sudo vi /lib/systemd/system/plexpy.service
  4. Put the following in the file:
    [Unit]
    Description=PlexPy - Stats for Plex Media Server usage
    
    [Service]
    ExecStart=/opt/plexpy/PlexPy.py --quiet --daemon --nolaunch --config /opt/plexpy/config.ini --datadir /opt/plexpy
    GuessMainPID=no
    Type=forking
    User=plexpy
    Group=nogroup
    
    [Install]
    WantedBy=multi-user.target
  5. Reload the services, enable plexpy and start it:
    sudo systemctl daemon-reload; sudo systemctl enable plexpy.service; sudo service plexpy start

Configuring Apache reverse proxy to allow access:

  1. Shutdown Apache and PlexPY:
    sudo service plexpy stop
    sudo service apache2 stop
  2. Change the settings in PlexPY to make it work behind a reverse proxy. Edit the config file and change the lines to:
    http_root = /plexpy
    http_proxy = 1
  3. Edit your Apache reverse config file for the domain hosting plexpy:
    ProxyPass /plexpy http://Local_IP_of_plexpy:8181/plexpy/
    ProxyPassReverse /plexpy http://Local_IP_of_plexpy:8181/plexpy/
  4. Start the services again:
    sudo service plexpy start
    sudo service apache2 start
  5. Test:

Windows Server Projects: Update

I’ve recently been working on building and improving my Windows environment at home. Over the last few weekend I’ve:

  1. Created an application server accessible via RDP and IIS. Improvements still to come: Setting up the Apache reverse proxy and SSL certificates for the IIS component of the app server.
  2. Created improved group policy objects including:
    1. Mapping network drives with the %username% wildcard to ensure that my domain users can access their network resources.
    2. Securing Windows 10 by using group policy to remove Cortana web searches and fixing other privacy related issues in Windows 10.
  3. Created a new Domain controller on my parents subnet.

Point 3, above, was easier than I expected. I had already created a VPN tunnel between the networks some time ago. Both sites have TP-Link 1043ND routers with OpenWRT installed. As such I was able to have the routers handle ‘routing’ using BGP. At this point, only the new DC server is using my local DNS server. Moving forward, I will setup the new DC server as a DNS server too.

The new DC server is running on my parent’s KVM host/media server (Typhoon). I’ve enabled easy access to the Hypervisor by installling virt-manager on my Ubuntu desktop and installing ssh keys on both Atlas and Typhoon.

Running Microdc2 as a Daemon on Startup and Limiting it’s Bandwidth on Ubuntu 16.04

Background:

Building on the last post, it is now time to install and configure a DC client to connect to the server. Unfortunately Microdc2 has a series of limitations that we will need to work around, these include:

  • Microdc2 does not come with any system startup scripts.
  • It has no ability to control the bandwidth used by file transfers.
  • It cannot be left to run by itself if you quit the terminal.

Thankfully there are ways to work around all of these. We can write and install our own Systemd scripts, use trickle to limit the bandwidth, and use screen to run microdc2 in a headless environment that allows us to check the status at will.

Setup:

I’ve assumed that screen, microdc2 and trickle are already installed, if not, type the following:

sudo apt install screen microdc2 trickle

All of microdc2’s settings are stored in ~/.microdc2/config

I have unashamedly used the config file found here as a template:

# You should make sure that this listen port is forwarded properly if you are behind a router. If you can't forward ports, set active off and use passive mode. This can work behind firewalls but is crippled and slower than a properly forwarded one. NOTE: the port MUST be set before active mode is set on.
set listenport Port#
set active on

# The following address should be set to your EXTERNAL ip address. This can be found by visiting www.whatismyip.com.
#set listenaddr xxx.xxx.xxx.xxx

# I like to turn autoreconnect on in case I get disconnected from the server for whatever reason.
set auto_reconnect on

# The following enables logging. Replace the logfile with wherever you want it to log to. You can of course turn it off by leaving the following two lines blank
set log_charset UTF-8
set logfile /home/user/.microdc2/log

# These should all be pretty self-explanatory. Nick is your nickname. If the hub requires a password, specify one here.
set description Description goes here
set email MyEmail@url.com
set nick NickName
#This is the password for the DC Server
set password Sup3rS3cr3t
set downloaddir /path/to/directory/

# The set speed option doesn't actually change anything, it only changes your REPORTED speed that other users see. The slot is how many simultaneous downloads people can get from you.
set speed 450KBps
set slots 5

#This is the hub connect command, it should be left until last
connect url:port

Ensure that the port you specify in the first line is open and forwarding to your microdc2 host. It isn’t necessary to set the listening address as it will listen for incoming connections on all interfaces, which is fine if you’re behind a firewall/router.

Run microdc2 as the user who will be running it as a daemon. and add any directories you would like to share with:

share /path/to/files

Microdc2 will only remember the files that are shared, all other settings must be stored in the config file.

It will potentially take a long time to hash all the files that you want to share depending on your hardware configuration and number of files. Your files won’t be shared until they are all hashed. This is useful of course, at good DC clients will download from multiple sources.

Running the program and setting limits:

Fundamentally, the command we will use looks like this:

screen -dmS microdc2 trickle -u 370 -t .1 microdc2

Screen will start in -d Detached mode, -m ignoring the $STY environment variable, forcing the creation of a session regardless of where it was started, -S session name, which I have called microdc2.

The program that screen calls is trickle. Trickle will only limit the upload speed -u, to 370Kbps. You may need to adjust this to suit yourself, -t .1 seconds to give a fine granularity of transfer speed. Again, i suggest testing this locally to see how it performs. Trickle will call the program microdc2 using its defaults for the user who called started the program.

Setting up a systemd startup script.

Create a systemd startup script and edit it:

sudo vi /lib/systemd/system/microdc2.service

Enter the following details, changing the username to the user who will run the program.

[Unit]
Description=Microdc2 Direct Connect Client
After=network.target

[Service]
Type=forking
ExecStart=/usr/bin/screen -dmS microdc2 trickle -u 370 -t .1 microdc2
User=username
Group=username

[Install] 
WantedBy=multi-user.target

Then run the update and start commands.

sudo systemctl daemon-reload
sudo systemctl enable microdc2.service
sudo service microcd2 start

Open the screen session

screen -r microdc2

close the screen session using the keyboard commands: CTRL+A, CTRL+D

Further reading:

Red Hat Systemd scripting
Trickle


How to Install and configure a Direct Connect Hub (PtokaX) on Ubuntu 16.04.

Background:

I wrote this documentation as the process serves as a good template for downloading, compiling from source, installing, configuring, and finally creating a systemd style script that will start a service at boot.

Process:

Download source from their website: http://www.ptokax.org/files/0.5.2.1-nix-src.tgz

wget http://www.ptokax.org/files/0.5.2.1-nix-src.tgz

Install the dependencies:

sudo apt install make g++ zlib1g-dev libtinyxml-dev liblua5.3-dev -y

Expand the archive and change into the directory:

tar -xf 0.5.2.1-nix-src.tgz;cd PtokaX

Compile the program (I’m compiling without database support):

make clean
make
sudo make install

Create a new system user to run the process:

sudo adduser --system --group --no-create-home --disabled-login ptokax

Create the directory in etc for the configuration files:

sudo mkdir /etc/ptokax

Run the initial config and configure according to your tastes, give the ptokax user access.

sudo PtokaX -m -c /etc/ptokax
sudo chown ptokax:ptokax -R /etc/ptokax/*

Create a new file in the directory: /lib/systemd/system/ called ptokax.service with the following in it:

[Unit]
Description=PtokaX Direct Connect Hub
After=network.target
#Requires=apache2.service

[Service]
Type=forking
ExecStart=/usr/local/bin/PtokaX -d -c /etc/ptokax
User=ptokax
Group=ptokax

[Install]
WantedBy=multi-user.target

Reload, enable and start the process.

sudo systemctl daemon-reload
sudo systemctl enable ptokax.service
sudo systemctl start ptokax.service


Test the connection:

Final Notes:

If you want to make configuration changes, stop the service first, then either run the Ptokax program as sudo with the -m -c /etc/ptokax flags to configure it, or manually edit it’s configuration files.

Further Reading:

http://wiki.ptokax.org/doku.php?id=guides:debian_bugbuntu
http://patrakov.blogspot.com.au/2011/01/writing-systemd-service-files.html


Enabling PCI passthrough of Hauppauge QuadHD PCIe TV Tuner Card with a Marvell 88SE9230 SATA controller

Background:

As the title suggests, this is a complex problem that I’ve had to work with. The goal has been to create a virtual machine running MythTV that can utilise the PCIe tuner card on the hypervisor.

The first step in the process was to compile and install the latest kernel image (at the time of writing this was 4.9.9). This was necessary as the kernel version that ships with Ubuntu 16.04 (version 4.4.0.xx)  does not have the most recent drivers that the tuner needs to function. This step I completed successfully and for more information, please see my previous posts.

Unfortunately, enabling iommu in the kernel activated a bug in the additional PCIe SATA card I have installed in the hypervisor that stopped the whole system from booting. More on that in a minute.

Affected Hardware:

Startech PEXSAT34RH 4-Port PCI Express 2.0 SATA Controller Card with a Marvell 88SE9230 chipset.
Hauppauge QuadHD PCIe TV Tuner Card.
Intel S1200SPL motherboard with a AXXRMM4LITE RMM4 module installed.

PCI devices identified as through lspci as:

05:00.0 Multimedia video controller: Conexant Systems, Inc. CX23887/8 PCIe Broadcast Audio and Video Decoder with 3D Comb (rev 04)
06:00.0 Multimedia video controller: Conexant Systems, Inc. CX23887/8 PCIe Broadcast Audio and Video Decoder with 3D Comb (rev 04)
02:00.0 SATA controller: Marvell Technology Group Ltd. 88SE9230 PCIe SATA 6Gb/s Controller (rev 11)

Partial resolution:

The first step was to enable iommu in the kernel without breaking the SATA controller card. the solution was to the enable iommu and set it to passthrough mode. This can be achieved on a Ubuntu system by editing /etc/default/grub and adding intel_iommu=on iommu=pt to the linux default settings: For my system it now looks like this:

GRUB_CMDLINE_LINUX_DEFAULT="nomodeset intel_iommu=on iommu=pt"

At the command line, run sudo update-grub and reboot.

The rest of the process, that includes adding the hardware to the VM host and enabling the pci_stub kernel module can be found in previous posts on my blog.

The only difficulties I encountered, and didn’t mention in my last blog post, was ensuring that the PCIe devices do not share IRQs. To check, I cross-referenced the output of:
:$ find /sys/kernel/iommu_groups/ -type l
with
:$ lscpi
I could confirm that the DVB-T tuner card had two interrupts, and did not share them with any other hardware device. More on that here.

Continuing problems:

After finally managing to get the PCI pass through function working which I verified by checking dmesg on the VM. I launched mythtv-setup and configured the tuner cards. MythTV successfully added them and I could add them to a video source. Unfortunately the system crashed when it tried to do an initial tune.
The console on the KVM host output the error:
vfio-pci pcie bus error severity=(uncorrected _Fatal), type=unaccessible,id=500(unregistered Agent ID)
And the console on the virtual machine output the error:
mpeg risc op code
and then promptly crashed.

Thankfully I have a backup single USB tuner, however it seems that the quest continues to get the tuner working properly.

Further reading:

IOMMU Bug in the 88SE9230 Chipset:
https://lime-technology.com/forum/index.php?topic=54410.0
http://lime-technology.com/forum/index.php?topic=40683
https://lime-technology.com/forum/index.php?topic=33511.0
Product Website

PCI Passthrough:
http://vfio.blogspot.com.au/2015/05/vfio-gpu-how-to-series-part-3-host.html

Hauppauge QuadHD PCIe TV Tuner Card:
LinuxTV Page
Product Website


How to Fix the Intel RMM4 No Signal on Linux

After installing the Remote Management Module AXXRMM4LITE into my Intel S1200SPL I was disappointed by being unable to see any output when using the Java applet.

Now, originally, I had noticed that after installation of the OS, there was no output to the monitor once Linux had booted. I got around this by installing a spare NVS300 graphic card and telling the BIOS to use it as the primary output.

Sensing that the two were related I removed the graphics card and told the BIOS to use the onboard graphics as the primary display. I still had the ‘no signal’ error in the java applet, but at least the hardware was configured correctly.  After doing some reading and searching, I was able to fix the issue by editing kernel boot parameters. In /etc/default/grub I added the option nomodeset to the GRUB_CMDLINE_LINUX_DEFAULT=””. such that it read:

GRUB_CMDLINE_LINUX_DEFAULT=”nomodeset”

Then I updated grub with:
$: sudo update-grub
$: sudo shutdown -hr now

And after rebooting, I was able to remotely see the console.

Further Reading:

https://community.linuxmint.com/tutorial/view/842

How to Compile the Linux Kernel from Source on Ubuntu 16.04 LTS

Background/Problem:

My KVM host, after a recent upgrade (see posts below) cannot start with the kernel option iommu=on enabled. Technically it can, however the system will not start due to a driver/bug issue with an additional SATA card I have installed:
:$ lspci

02:00.0 SATA controller: Marvell Technology Group Ltd. 88SE9230 PCIe SATA 6Gb/s Controller (rev 11)

Disks simply do not register when using iommu. The Bugzilla report can be found here and more information can be had here. The references are old, so my hope is that it has been patched in the latest kernel images.

Furthermore, I need the latest kernel to use the Quad tuner PCI-E card I have:
:$ lspci

05:00.0 Multimedia video controller: Conexant Systems, Inc. CX23887/8 PCIe Broadcast Audio and Video Decoder with 3D Comb (rev 04)

The quad tuner needs kernel 4.8 to run. More information here. So fundamentally, I need to compile the latest stable kernel image to get the full use of my system and then pass the PCIE tuner card through to my Media VM.

The Process:

I recommend doing this I have done, inside a reasonably powered Virtual machine. I’ve gone back through things and corrected my instructions when I’ve run into problems. This process will generate a Debian package that you can install on any Debian based OS (such as Ubuntu).

Problems:

  1. Not giving enough RAM, CPU and disk space to the VM to compile (at all) or in a timely manner.
    1. I’ve given my VM 4 cores, 4GB RAM and an ‘external’ hard drive of 30GB to use to compile the kernel.
  2. Utilize all the cores. add the line: CONCURRENCY_LEVEL= 4 to /etc/kernel-pkg.conf to use all 4 cores when compiling (once the package is installed, see below)
  3. Not having some essential packages installed that caused the process to stop. such as libssl-dev.

Using all the cores makes it go much faster!

Steps:

At the command prompt, install all the packages you need to compile the kernel:
:$ sudo apt-get install fakeroot kernel-package gcc build-essential libncurses5-dev qt5-default libssl-dev

Download, to a disk that has ~20GB free, the latest stable kernel version. At the time of writing this was 4.9.9. Extract it and cd into the directory
:$ wget https://cdn.kernel.org/pub/linux/kernel/v4.x/linux-4.9.9.tar.xz
:$ tar -xf linux-4.9.9.tar.xz
:$ cd linux.-4.9.9

Assuming you’re running this in a desktop Linux environment, run make xconfig, alternatively, if you’re using a terminal server, make menuconfig will do.

The default settings should do in most instances.

Save and close the configuration. Make the build environment clean, then begin the compile process:
:$ make-kpkg clean
:$ fakeroot make-kpkg –initrd –revision=4.9.9.linux kernel_image kernel_headers

You can save time by compiling a kernel with only the hardware that you have installed. Do this by deselecting them in the xconfig/menuconfig. The downside is that if you add new hardware, you’ll need to recompile the kernel.

For an explanation on the above fakeroot command, please see this Debian manual page. You should now have a custom kernel image compiling.

Once it’s completed, cd to the upper directory, and install the kernel:
:$ cd ..
:$ sudo dpkg -i linux-image-4.9.9_4.9.9.linux_amd64.deb linux-headers-4.9.9.9_4.9.9.9.linux_amd64.deb
:$ sudo shutdown -hr now

After restarting the VM, you can check the currently running version of the kernel by typing at the command prompt:

Additional extra step:

Prove to yourself that you’ve created a usable package by spinning up a shiny new VM, sftp the debian package to it, then install and reboot.

Further reading:

https://www.cyberciti.biz/faq/debian-ubuntu-building-installing-a-custom-linux-kernel/

Rsync logging

The Problem:

My media server runs a rsync job via ssh to another server every night between 2230 and 0600. Every time the scripts runs, it generates a new time-stamped log file. Eventually there are quite a few log files that require manual cleanup. I want to automate this process and cleanup the log file generation.

The log files

The bash script is kept in my home directory (for easy, unscheduled syncs) and is executed using cron.

My crontab file contains:

30 22 * * * /home/wargus/rsync.sh >/dev/null 2>&1
0 6 * * * killall rsync >/dev/null 2>&1

Contents of script:

#!/bin/bash
rsync –bwlimit=450 –delete –protect-args –size-only –copy-dirlinks –log-file=/var/log/rsync/log.`date +”%Y%m%d_%H%M%S”` -avPe ssh “/path/to/files/” “user@host:/path/to/files/”

I won’t go into the details of the rsync command above, suffice to say it works and limits bandwidth to something reasonable for a slow, home ADSL connection. I expect that will change when NBN will finally (if ever) arrive at my off-site location. For this to work, I did have to generate ssh keys to allow the job to execute without user intervention.

The Solution:


The addition of two line lines to my rsync.sh above the rsync command script did the trick:

find /var/log/rsync/ -mtime +8 |xargs -I % sh -c ‘rm -f %’;
find /var/log/rsync/log.* |xargs -I % sh -c ‘tar -rf /var/log/rsync/rsync.1.tar %; rm -f %’;

The first line finds anything older than 8 days, then using the list output by find input, deletes all the files. On first run it deleted all my older log files, but going forward, it will remove the archive after 8 days.

The second line fill find every log file in that directory and appends it to an archive, if it exists, or creates the archive first if it does not.

Now, when the script executes, I have no problem knowing what the newest log is and in case I want to check older ones, I can open the archive and have a look.

Rebuilding the Hypervisor with new hardware

Good news!
I’ve spend the day rebuilding the server. I’ve completely overhauled the system, replacing what was an aging AMD octacore with a new Intel server.

New specs are:
CPU: Intel E3-1245v5 3.5GHz 4 Core, 8 threads.
Motherboard: INTEL S1200SPL
RAM: 32GB (4x8GB) Crucial 2400Mhz ECC
Other components: Nvidia NVS300 gfx card, quad DVB-T tuner, additional SATA raid card for the 11 hard disks in the two raid arrays.
All houses in a Cooler Master Cosmos II Full Tower.

All in all, the migration has been very smooth. I’ve been able to get all the VMs up and running again without much fuss. I didn’t realise that remote console through the Intel BMC web console was not possible without an additional component, so I’ll be ordering an Intel remote management component (AXXRMM4LITE2) very soon.