Windows Server Projects: Update

I’ve recently been working on building and improving my Windows environment at home. Over the last few weekend I’ve:

  1. Created an application server accessible via RDP and IIS. Improvements still to come: Setting up the Apache reverse proxy and SSL certificates for the IIS component of the app server.
  2. Created improved group policy objects including:
    1. Mapping network drives with the %username% wildcard to ensure that my domain users can access their network resources.
    2. Securing Windows 10 by using group policy to remove Cortana web searches and fixing other privacy related issues in Windows 10.
  3. Created a new Domain controller on my parents subnet.

Point 3, above, was easier than I expected. I had already created a VPN tunnel between the networks some time ago. Both sites have TP-Link 1043ND routers with OpenWRT installed. As such I was able to have the routers handle ‘routing’ using BGP. At this point, only the new DC server is using my local DNS server. Moving forward, I will setup the new DC server as a DNS server too.

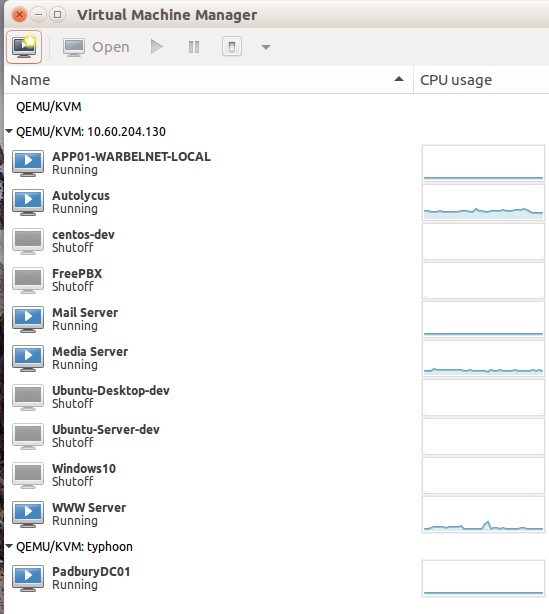
The new DC server is running on my parent’s KVM host/media server (Typhoon). I’ve enabled easy access to the Hypervisor by installling virt-manager on my Ubuntu desktop and installing ssh keys on both Atlas and Typhoon.

Running Microdc2 as a Daemon on Startup and Limiting it’s Bandwidth on Ubuntu 16.04

Background:

Building on the last post, it is now time to install and configure a DC client to connect to the server. Unfortunately Microdc2 has a series of limitations that we will need to work around, these include:

  • Microdc2 does not come with any system startup scripts.
  • It has no ability to control the bandwidth used by file transfers.
  • It cannot be left to run by itself if you quit the terminal.

Thankfully there are ways to work around all of these. We can write and install our own Systemd scripts, use trickle to limit the bandwidth, and use screen to run microdc2 in a headless environment that allows us to check the status at will.

Setup:

I’ve assumed that screen, microdc2 and trickle are already installed, if not, type the following:

sudo apt install screen microdc2 trickle

All of microdc2’s settings are stored in ~/.microdc2/config

I have unashamedly used the config file found here as a template:

# You should make sure that this listen port is forwarded properly if you are behind a router. If you can't forward ports, set active off and use passive mode. This can work behind firewalls but is crippled and slower than a properly forwarded one. NOTE: the port MUST be set before active mode is set on.
set listenport Port#
set active on

# The following address should be set to your EXTERNAL ip address. This can be found by visiting www.whatismyip.com.
#set listenaddr xxx.xxx.xxx.xxx

# I like to turn autoreconnect on in case I get disconnected from the server for whatever reason.
set auto_reconnect on

# The following enables logging. Replace the logfile with wherever you want it to log to. You can of course turn it off by leaving the following two lines blank
set log_charset UTF-8
set logfile /home/user/.microdc2/log

# These should all be pretty self-explanatory. Nick is your nickname. If the hub requires a password, specify one here.
set description Description goes here
set email MyEmail@url.com
set nick NickName
#This is the password for the DC Server
set password Sup3rS3cr3t
set downloaddir /path/to/directory/

# The set speed option doesn't actually change anything, it only changes your REPORTED speed that other users see. The slot is how many simultaneous downloads people can get from you.
set speed 450KBps
set slots 5

#This is the hub connect command, it should be left until last
connect url:port

Ensure that the port you specify in the first line is open and forwarding to your microdc2 host. It isn’t necessary to set the listening address as it will listen for incoming connections on all interfaces, which is fine if you’re behind a firewall/router.

Run microdc2 as the user who will be running it as a daemon. and add any directories you would like to share with:

share /path/to/files

Microdc2 will only remember the files that are shared, all other settings must be stored in the config file.

It will potentially take a long time to hash all the files that you want to share depending on your hardware configuration and number of files. Your files won’t be shared until they are all hashed. This is useful of course, at good DC clients will download from multiple sources.

Running the program and setting limits:

Fundamentally, the command we will use looks like this:

screen -dmS microdc2 trickle -u 370 -t .1 microdc2

Screen will start in -d Detached mode, -m ignoring the $STY environment variable, forcing the creation of a session regardless of where it was started, -S session name, which I have called microdc2.

The program that screen calls is trickle. Trickle will only limit the upload speed -u, to 370Kbps. You may need to adjust this to suit yourself, -t .1 seconds to give a fine granularity of transfer speed. Again, i suggest testing this locally to see how it performs. Trickle will call the program microdc2 using its defaults for the user who called started the program.

Setting up a systemd startup script.

Create a systemd startup script and edit it:

sudo vi /lib/systemd/system/microdc2.service

Enter the following details, changing the username to the user who will run the program.

[Unit]
Description=Microdc2 Direct Connect Client
After=network.target

[Service]
Type=forking
ExecStart=/usr/bin/screen -dmS microdc2 trickle -u 370 -t .1 microdc2
User=username
Group=username

[Install] 
WantedBy=multi-user.target

Then run the update and start commands.

sudo systemctl daemon-reload
sudo systemctl enable microdc2.service
sudo service microcd2 start

Open the screen session

screen -r microdc2

close the screen session using the keyboard commands: CTRL+A, CTRL+D

Further reading:

Red Hat Systemd scripting
Trickle
 

How to Install and configure a Direct Connect Hub (PtokaX) on Ubuntu 16.04.

Background:

I wrote this documentation as the process serves as a good template for downloading, compiling from source, installing, configuring, and finally creating a systemd style script that will start a service at boot.

Process:

Download source from their website: http://www.ptokax.org/files/0.5.2.1-nix-src.tgz

wget http://www.ptokax.org/files/0.5.2.1-nix-src.tgz

Install the dependencies:

sudo apt install make g++ zlib1g-dev libtinyxml-dev liblua5.3-dev -y

Expand the archive and change into the directory:

tar -xf 0.5.2.1-nix-src.tgz;cd PtokaX

Compile the program (I’m compiling without database support):

make clean
make
sudo make install

Create a new system user to run the process:

sudo adduser --system --group --no-create-home --disabled-login ptokax

Create the directory in etc for the configuration files:

sudo mkdir /etc/ptokax

Run the initial config and configure according to your tastes, give the ptokax user access.

sudo PtokaX -m -c /etc/ptokax
sudo chown ptokax:ptokax -R /etc/ptokax/*

Create a new file in the directory: /lib/systemd/system/ called ptokax.service with the following in it:

[Unit]
Description=PtokaX Direct Connect Hub
After=network.target
#Requires=apache2.service

[Service]
Type=forking
ExecStart=/usr/local/bin/PtokaX -d -c /etc/ptokax
User=ptokax
Group=ptokax

[Install]
WantedBy=multi-user.target

Reload, enable and start the process.

sudo systemctl daemon-reload
sudo systemctl enable ptokax.service
sudo systemctl start ptokax.service


Test the connection:

Final Notes:

If you want to make configuration changes, stop the service first, then either run the Ptokax program as sudo with the -m -c /etc/ptokax flags to configure it, or manually edit it’s configuration files.

Further Reading:

http://wiki.ptokax.org/doku.php?id=guides:debian_bugbuntu
http://patrakov.blogspot.com.au/2011/01/writing-systemd-service-files.html


Enabling PCI passthrough of Hauppauge QuadHD PCIe TV Tuner Card with a Marvell 88SE9230 SATA controller

Background:

As the title suggests, this is a complex problem that I’ve had to work with. The goal has been to create a virtual machine running MythTV that can utilise the PCIe tuner card on the hypervisor.

The first step in the process was to compile and install the latest kernel image (at the time of writing this was 4.9.9). This was necessary as the kernel version that ships with Ubuntu 16.04 (version 4.4.0.xx)  does not have the most recent drivers that the tuner needs to function. This step I completed successfully and for more information, please see my previous posts.

Unfortunately, enabling iommu in the kernel activated a bug in the additional PCIe SATA card I have installed in the hypervisor that stopped the whole system from booting. More on that in a minute.

Affected Hardware:

Startech PEXSAT34RH 4-Port PCI Express 2.0 SATA Controller Card with a Marvell 88SE9230 chipset.
Hauppauge QuadHD PCIe TV Tuner Card.
Intel S1200SPL motherboard with a AXXRMM4LITE RMM4 module installed.

PCI devices identified as through lspci as:

05:00.0 Multimedia video controller: Conexant Systems, Inc. CX23887/8 PCIe Broadcast Audio and Video Decoder with 3D Comb (rev 04)
06:00.0 Multimedia video controller: Conexant Systems, Inc. CX23887/8 PCIe Broadcast Audio and Video Decoder with 3D Comb (rev 04)
02:00.0 SATA controller: Marvell Technology Group Ltd. 88SE9230 PCIe SATA 6Gb/s Controller (rev 11)

Partial resolution:

The first step was to enable iommu in the kernel without breaking the SATA controller card. the solution was to the enable iommu and set it to passthrough mode. This can be achieved on a Ubuntu system by editing /etc/default/grub and adding intel_iommu=on iommu=pt to the linux default settings: For my system it now looks like this:

GRUB_CMDLINE_LINUX_DEFAULT="nomodeset intel_iommu=on iommu=pt"

At the command line, run sudo update-grub and reboot.

The rest of the process, that includes adding the hardware to the VM host and enabling the pci_stub kernel module can be found in previous posts on my blog.

The only difficulties I encountered, and didn’t mention in my last blog post, was ensuring that the PCIe devices do not share IRQs. To check, I cross-referenced the output of:
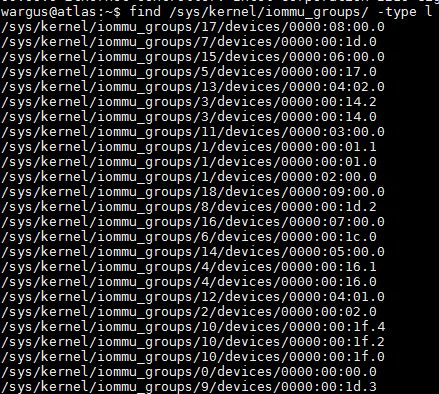
:$ find /sys/kernel/iommu_groups/ -type l
with
:$ lscpi
I could confirm that the DVB-T tuner card had two interrupts, and did not share them with any other hardware device. More on that here.

Continuing problems:

After finally managing to get the PCI pass through function working which I verified by checking dmesg on the VM. I launched mythtv-setup and configured the tuner cards. MythTV successfully added them and I could add them to a video source. Unfortunately the system crashed when it tried to do an initial tune.
The console on the KVM host output the error:
vfio-pci pcie bus error severity=(uncorrected _Fatal), type=unaccessible,id=500(unregistered Agent ID)
And the console on the virtual machine output the error:
mpeg risc op code
and then promptly crashed.

Thankfully I have a backup single USB tuner, however it seems that the quest continues to get the tuner working properly.

Further reading:

IOMMU Bug in the 88SE9230 Chipset:
https://lime-technology.com/forum/index.php?topic=54410.0
http://lime-technology.com/forum/index.php?topic=40683
https://lime-technology.com/forum/index.php?topic=33511.0
Product Website

PCI Passthrough:
http://vfio.blogspot.com.au/2015/05/vfio-gpu-how-to-series-part-3-host.html

Hauppauge QuadHD PCIe TV Tuner Card:
LinuxTV Page
Product Website


How to Fix the Intel RMM4 No Signal on Linux

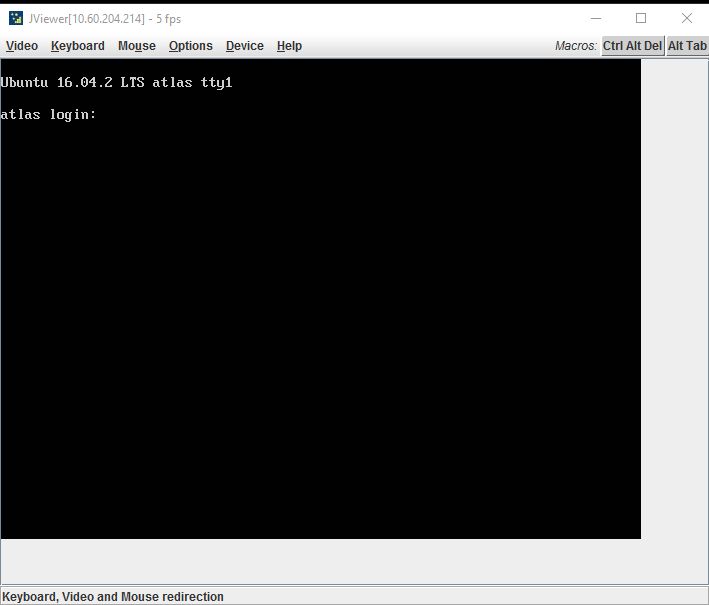
After installing the Remote Management Module AXXRMM4LITE into my Intel S1200SPL I was disappointed by being unable to see any output when using the Java applet.

Now, originally, I had noticed that after installation of the OS, there was no output to the monitor once Linux had booted. I got around this by installing a spare NVS300 graphic card and telling the BIOS to use it as the primary output.

Sensing that the two were related I removed the graphics card and told the BIOS to use the onboard graphics as the primary display. I still had the ‘no signal’ error in the java applet, but at least the hardware was configured correctly.  After doing some reading and searching, I was able to fix the issue by editing kernel boot parameters. In /etc/default/grub I added the option nomodeset to the GRUB_CMDLINE_LINUX_DEFAULT=””. such that it read:

GRUB_CMDLINE_LINUX_DEFAULT=”nomodeset”

Then I updated grub with:
$: sudo update-grub
$: sudo shutdown -hr now

And after rebooting, I was able to remotely see the console.

Further Reading:

https://community.linuxmint.com/tutorial/view/842

How to Compile the Linux Kernel from Source on Ubuntu 16.04 LTS

Background/Problem:

My KVM host, after a recent upgrade (see posts below) cannot start with the kernel option iommu=on enabled. Technically it can, however the system will not start due to a driver/bug issue with an additional SATA card I have installed:
:$ lspci

02:00.0 SATA controller: Marvell Technology Group Ltd. 88SE9230 PCIe SATA 6Gb/s Controller (rev 11)

Disks simply do not register when using iommu. The Bugzilla report can be found here and more information can be had here. The references are old, so my hope is that it has been patched in the latest kernel images.

Furthermore, I need the latest kernel to use the Quad tuner PCI-E card I have:
:$ lspci

05:00.0 Multimedia video controller: Conexant Systems, Inc. CX23887/8 PCIe Broadcast Audio and Video Decoder with 3D Comb (rev 04)

The quad tuner needs kernel 4.8 to run. More information here. So fundamentally, I need to compile the latest stable kernel image to get the full use of my system and then pass the PCIE tuner card through to my Media VM.

The Process:

I recommend doing this I have done, inside a reasonably powered Virtual machine. I’ve gone back through things and corrected my instructions when I’ve run into problems. This process will generate a Debian package that you can install on any Debian based OS (such as Ubuntu).

Problems:

  1. Not giving enough RAM, CPU and disk space to the VM to compile (at all) or in a timely manner.
    1. I’ve given my VM 4 cores, 4GB RAM and an ‘external’ hard drive of 30GB to use to compile the kernel.
  2. Utilize all the cores. add the line: CONCURRENCY_LEVEL= 4 to /etc/kernel-pkg.conf to use all 4 cores when compiling (once the package is installed, see below)
  3. Not having some essential packages installed that caused the process to stop. such as libssl-dev.

Using all the cores makes it go much faster!

Steps:

At the command prompt, install all the packages you need to compile the kernel:
:$ sudo apt-get install fakeroot kernel-package gcc build-essential libncurses5-dev qt5-default libssl-dev

Download, to a disk that has ~20GB free, the latest stable kernel version. At the time of writing this was 4.9.9. Extract it and cd into the directory
:$ wget https://cdn.kernel.org/pub/linux/kernel/v4.x/linux-4.9.9.tar.xz
:$ tar -xf linux-4.9.9.tar.xz
:$ cd linux.-4.9.9

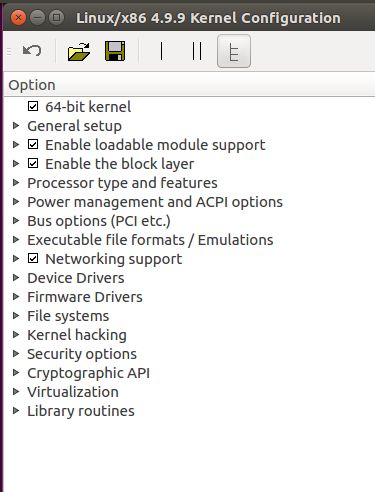
Assuming you’re running this in a desktop Linux environment, run make xconfig, alternatively, if you’re using a terminal server, make menuconfig will do.

The default settings should do in most instances.

Save and close the configuration. Make the build environment clean, then begin the compile process:
:$ make-kpkg clean
:$ fakeroot make-kpkg –initrd –revision=4.9.9.linux kernel_image kernel_headers

You can save time by compiling a kernel with only the hardware that you have installed. Do this by deselecting them in the xconfig/menuconfig. The downside is that if you add new hardware, you’ll need to recompile the kernel.

For an explanation on the above fakeroot command, please see this Debian manual page. You should now have a custom kernel image compiling.

Once it’s completed, cd to the upper directory, and install the kernel:
:$ cd ..
:$ sudo dpkg -i linux-image-4.9.9_4.9.9.linux_amd64.deb linux-headers-4.9.9.9_4.9.9.9.linux_amd64.deb
:$ sudo shutdown -hr now

After restarting the VM, you can check the currently running version of the kernel by typing at the command prompt:

Additional extra step:

Prove to yourself that you’ve created a usable package by spinning up a shiny new VM, sftp the debian package to it, then install and reboot.

Further reading:

https://www.cyberciti.biz/faq/debian-ubuntu-building-installing-a-custom-linux-kernel/

Rsync logging

The Problem:

My media server runs a rsync job via ssh to another server every night between 2230 and 0600. Every time the scripts runs, it generates a new time-stamped log file. Eventually there are quite a few log files that require manual cleanup. I want to automate this process and cleanup the log file generation.

The log files

The bash script is kept in my home directory (for easy, unscheduled syncs) and is executed using cron.

My crontab file contains:

30 22 * * * /home/wargus/rsync.sh >/dev/null 2>&1
0 6 * * * killall rsync >/dev/null 2>&1

Contents of script:

#!/bin/bash
rsync –bwlimit=450 –delete –protect-args –size-only –copy-dirlinks –log-file=/var/log/rsync/log.`date +”%Y%m%d_%H%M%S”` -avPe ssh “/path/to/files/” “user@host:/path/to/files/”

I won’t go into the details of the rsync command above, suffice to say it works and limits bandwidth to something reasonable for a slow, home ADSL connection. I expect that will change when NBN will finally (if ever) arrive at my off-site location. For this to work, I did have to generate ssh keys to allow the job to execute without user intervention.

The Solution:


The addition of two line lines to my rsync.sh above the rsync command script did the trick:

find /var/log/rsync/ -mtime +8 |xargs -I % sh -c ‘rm -f %’;
find /var/log/rsync/log.* |xargs -I % sh -c ‘tar -rf /var/log/rsync/rsync.1.tar %; rm -f %’;

The first line finds anything older than 8 days, then using the list output by find input, deletes all the files. On first run it deleted all my older log files, but going forward, it will remove the archive after 8 days.

The second line fill find every log file in that directory and appends it to an archive, if it exists, or creates the archive first if it does not.

Now, when the script executes, I have no problem knowing what the newest log is and in case I want to check older ones, I can open the archive and have a look.

Rebuilding the Hypervisor with new hardware

Good news!
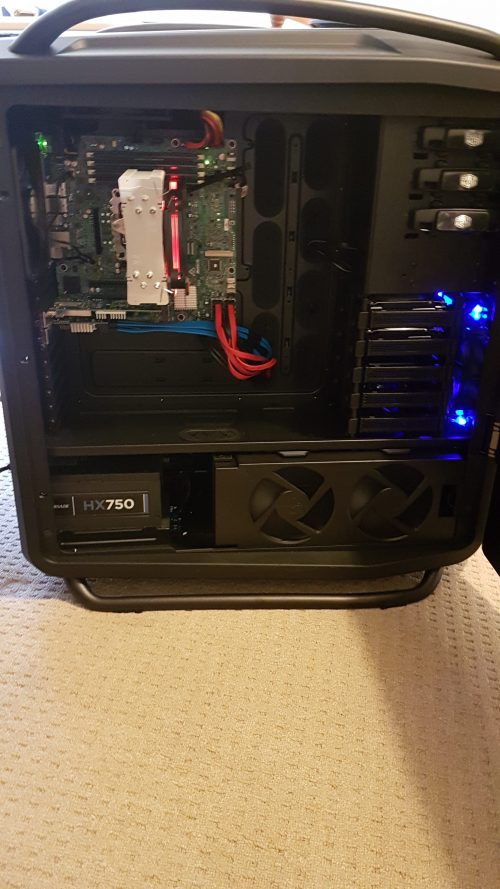
I’ve spend the day rebuilding the server. I’ve completely overhauled the system, replacing what was an aging AMD octacore with a new Intel server.

New specs are:
CPU: Intel E3-1245v5 3.5GHz 4 Core, 8 threads.
Motherboard: INTEL S1200SPL
RAM: 32GB (4x8GB) Crucial 2400Mhz ECC
Other components: Nvidia NVS300 gfx card, quad DVB-T tuner, additional SATA raid card for the 11 hard disks in the two raid arrays.
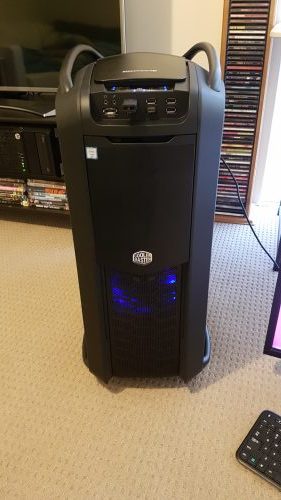
All houses in a Cooler Master Cosmos II Full Tower.

All in all, the migration has been very smooth. I’ve been able to get all the VMs up and running again without much fuss. I didn’t realise that remote console through the Intel BMC web console was not possible without an additional component, so I’ll be ordering an Intel remote management component (AXXRMM4LITE2) very soon.

PCI and File System Pass-through on KVM

Putting aside Landscape for a moment. That, for the record, I was able to get up and running by following the documentation. The server generated snake-oil SSL certificates and enabled SSL by default which would mean quite a lot of re-configuring to make it work behind the reverse proxy. More problematic was that the other machines, when trying to connect to the landscape server, would reject the connection due to the self-signed certificate. The mechanisms for Landscape aren’t clear, so at this point I’m unsure if this would be a problem if I disabled SSL on apache only (thereby allowing the reverse proxy to handle SSL – and have all the landscape client connect via it) or if the landscape service itself also needed the SSL certificates. If that’s the case then the challenge will be to have the current SSL certs copied to the landscape server when they’re renewed (or nightly via rsync and cron).

So as I said, I’m putting that aside for the moment to focus on changing how my VMs on my KVM server access local files and migrating the last few services on the KVM host itself to a VM. Currently that includes SAMBA/SMB file shares. MythTV and Plex. 

The biggest hurdle is to move mythtv to a VM as it will require PCI passthrough for the TV tuner card. This is possible and the documentation makes it clear how to achieve this, however when I initialled passed the TV tuner card to the VM, the VM refuses to start. Similarly, USB devices are not being passed through.

After researching, there appears to be a bug in apparmor that stops USB from being passed through. Solution available here.

The PCI problem was a little more complex. After checking the output of the error logs for KVM and dmesg and googling what I could. the problem ended up being that PCI cards and devices that share a bus, therefore share the interrupts and have to all be added to the virtual machine. The system cannot differentiate between them. After checking the output of lspci and comparing that to the list of devices in /sys/kernel/iommu_groups/11 (group 11 was the where all the devices were that I needed to pass through). I added all the components of the TV tuner card and a IEEE1394 port on the mother board (that I have never used) to the VM. To make my life easy and ensure I didn’t make mistakes I wrote it out as a script, based on the documentation here.

#!/bin/bash

echo “14f1 8800” > /sys/bus/pci/drivers/pci-stub/new_id
echo “0000:05:06.0” > /sys/bus/pci/devices/0000:05:06.0/driver/unbind
echo “0000:05:06.0” > /sys/bus/pci/drivers/pci-stub/bind

echo “14f1 8802” > /sys/bus/pci/drivers/pci-stub/new_id
echo “0000:05:06.2” > /sys/bus/pci/devices/0000:05:06.2/driver/unbind
echo “0000:05:06.2” > /sys/bus/pci/drivers/pci-stub/bind

echo “14f1 8804” > /sys/bus/pci/drivers/pci-stub/new_id
echo “0000:05:06.4” > /sys/bus/pci/devices/0000:05:06.2/driver/unbind
echo “0000:05:06.4” > /sys/bus/pci/drivers/pci-stub/bind

echo “1106 3044” > /sys/bus/pci/drivers/pci-stub/new_id
echo “0000:05:0e.0” > /sys/bus/pci/devices/0000:05:0e.0/driver/unbind
echo “0000:05:0e.0” > /sys/bus/pci/drivers/pci-stub/bind

executing the script and then adding all the above PCI devices did the trick. The VM now starts and lists all the PCI devices:

wargus@media:~$ lspci

00:08.0 Multimedia controller: Conexant Systems, Inc. CX23880/1/2/3 PCI Video and Audio Decoder [MPEG Port] (rev 05)
00:09.0 Multimedia video controller: Conexant Systems, Inc. CX23880/1/2/3 PCI Video and Audio Decoder (rev 05)
00:0a.0 Multimedia controller: Conexant Systems, Inc. CX23880/1/2/3 PCI Video and Audio Decoder [IR Port] (rev 05)
00:0b.0 FireWire (IEEE 1394): VIA Technologies, Inc. VT6306/7/8 [Fire II(M)] IEEE 1394 OHCI Controller (rev c0)

A quick probe of lsmod also shows that the v4l2 drivers are loaded as are the drivers for the TV tuner card (cx8800). Changes are persistent after a restart of the VM host, too.

Setting up Plex media server, mythTV and samba shouldn’t be a challenge from this point.

This leaves the last challenge – setting up file system pass-through on the VMs. The documentation, here and here, perhaps wasn’t as helpful as it could be. I tested out FS pass-through on my mail server first, as it also hosted my nextcloud installation. I wanted to move the data files that constitute my nextcloud storage to the much roomier RAID+LVM on the KVM host itself.

There was suffice to say, a lot of flaffing about before I managed to get it to work. The screenshot below shows the configuration in virt-manager.

What it does not show are the file permissions on the KVM host. The directory has the permissions of:
ls -l
drwxr-xr-x 3 libvirt-qemu kvm 18 Jan 1 09:44 nextcloud

This is because in ‘mapped’ mode “files are created with Qemu user credentials and the client-user’s credentials are saved in extended attributes.” Whereby client-user is referring to users on the VM. Once mounted on the guest OS with:

sudo mount -t 9p -o trans=virtio,version=9p2000.L /nextcloud /nextcloud/

I was about to copy in the data directory (when apache2 was off) preserving the ownership and permissions of the files.

On the host OS, the files all appear to be owned by libvert-qemu and kvm, on the guest OS they all appear to be owned by the www-data user. The final step is of course to make the changes persistant by editing the /ect/fstab file and adding the in the line:
/nextcloud /nextcloud 9p trans=virtio,version=9p2000.L 0 0

Fixing little things

This was a weekend of Christmas/fixing niggling problems on my systems.

  1. Migrate to NextCloud from Owncloud.
    1. Easy – thanks to documentation and a blog post.
  2. Fix accessibility problems with the calendar plugin in nextcloud.
    1. This was primarly caused by my ignorance – when adding calendars in, say, Thunderbird you need to be very specific on the URL – nextcloud does not make it clear what the url is for specific calendar unless you go looking for it. Simply adding the primary address (https://www.warbel.net/owncloud/remote.php/dav/) will not work.
  3. Fix the zabbix server, as it wasn’t starting with the system.
    1. Checking the service status show the issue here. It wasn’t set to start automatically. Fixed with sudo systemctl enable zabbix-server.service.

As far as getting landscape up and running – this seems a little problematic. After spinning up an VM and using the documentation I can’t seem to add machines to the landscape server. This is because it uses self-signed ssl certificates. The solution is easy enough – provide the letsencrypt certificates. However because it sits behind a reverse proxy the website will need configured to not use SSL but as far as I can tell so far, the landscape service itself needs the ssl certificate. This can be fixed by using rsync and cron to move the necessary files, but it’s going to be a pain. We’ll see.