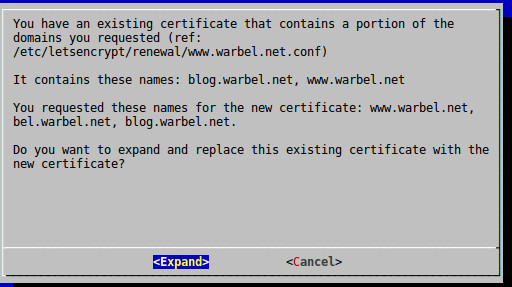
Putting aside Landscape for a moment. That, for the record, I was able to get up and running by following the documentation. The server generated snake-oil SSL certificates and enabled SSL by default which would mean quite a lot of re-configuring to make it work behind the reverse proxy. More problematic was that the other machines, when trying to connect to the landscape server, would reject the connection due to the self-signed certificate. The mechanisms for Landscape aren’t clear, so at this point I’m unsure if this would be a problem if I disabled SSL on apache only (thereby allowing the reverse proxy to handle SSL – and have all the landscape client connect via it) or if the landscape service itself also needed the SSL certificates. If that’s the case then the challenge will be to have the current SSL certs copied to the landscape server when they’re renewed (or nightly via rsync and cron).
So as I said, I’m putting that aside for the moment to focus on changing how my VMs on my KVM server access local files and migrating the last few services on the KVM host itself to a VM. Currently that includes SAMBA/SMB file shares. MythTV and Plex.
The biggest hurdle is to move mythtv to a VM as it will require PCI passthrough for the TV tuner card. This is possible and the documentation makes it clear how to achieve this, however when I initialled passed the TV tuner card to the VM, the VM refuses to start. Similarly, USB devices are not being passed through.
After researching, there appears to be a bug in apparmor that stops USB from being passed through. Solution available here.
The PCI problem was a little more complex. After checking the output of the error logs for KVM and dmesg and googling what I could. the problem ended up being that PCI cards and devices that share a bus, therefore share the interrupts and have to all be added to the virtual machine. The system cannot differentiate between them. After checking the output of lspci and comparing that to the list of devices in /sys/kernel/iommu_groups/11 (group 11 was the where all the devices were that I needed to pass through). I added all the components of the TV tuner card and a IEEE1394 port on the mother board (that I have never used) to the VM. To make my life easy and ensure I didn’t make mistakes I wrote it out as a script, based on the documentation here.
#!/bin/bash
echo “14f1 8800” > /sys/bus/pci/drivers/pci-stub/new_id
echo “0000:05:06.0” > /sys/bus/pci/devices/0000:05:06.0/driver/unbind
echo “0000:05:06.0” > /sys/bus/pci/drivers/pci-stub/bindecho “14f1 8802” > /sys/bus/pci/drivers/pci-stub/new_id
echo “0000:05:06.2” > /sys/bus/pci/devices/0000:05:06.2/driver/unbind
echo “0000:05:06.2” > /sys/bus/pci/drivers/pci-stub/bindecho “14f1 8804” > /sys/bus/pci/drivers/pci-stub/new_id
echo “0000:05:06.4” > /sys/bus/pci/devices/0000:05:06.2/driver/unbind
echo “0000:05:06.4” > /sys/bus/pci/drivers/pci-stub/bindecho “1106 3044” > /sys/bus/pci/drivers/pci-stub/new_id
echo “0000:05:0e.0” > /sys/bus/pci/devices/0000:05:0e.0/driver/unbind
echo “0000:05:0e.0” > /sys/bus/pci/drivers/pci-stub/bind
executing the script and then adding all the above PCI devices did the trick. The VM now starts and lists all the PCI devices:
wargus@media:~$ lspci
…
00:08.0 Multimedia controller: Conexant Systems, Inc. CX23880/1/2/3 PCI Video and Audio Decoder [MPEG Port] (rev 05)
00:09.0 Multimedia video controller: Conexant Systems, Inc. CX23880/1/2/3 PCI Video and Audio Decoder (rev 05)
00:0a.0 Multimedia controller: Conexant Systems, Inc. CX23880/1/2/3 PCI Video and Audio Decoder [IR Port] (rev 05)
00:0b.0 FireWire (IEEE 1394): VIA Technologies, Inc. VT6306/7/8 [Fire II(M)] IEEE 1394 OHCI Controller (rev c0)
A quick probe of lsmod also shows that the v4l2 drivers are loaded as are the drivers for the TV tuner card (cx8800). Changes are persistent after a restart of the VM host, too.
Setting up Plex media server, mythTV and samba shouldn’t be a challenge from this point.
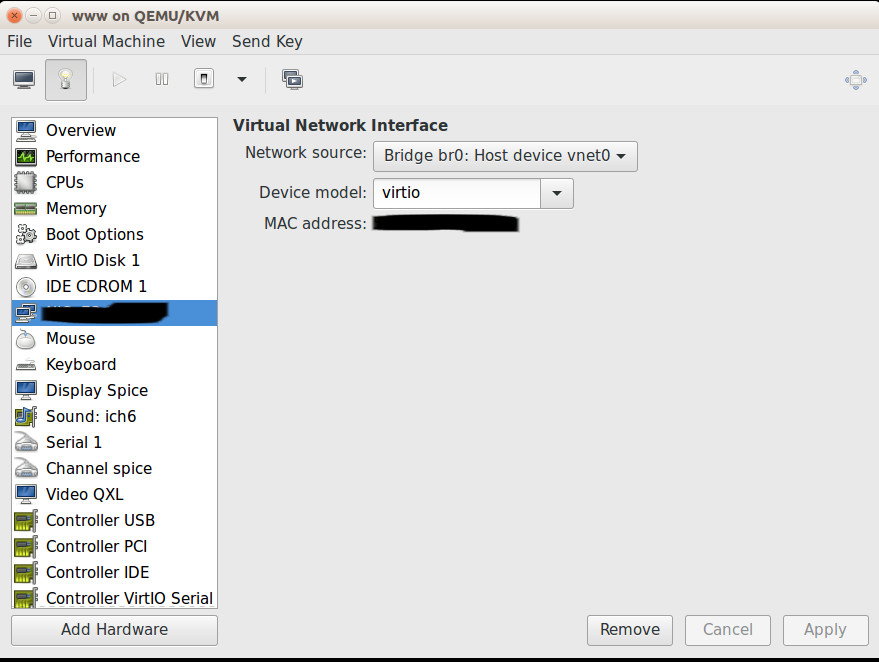
This leaves the last challenge – setting up file system pass-through on the VMs. The documentation, here and here, perhaps wasn’t as helpful as it could be. I tested out FS pass-through on my mail server first, as it also hosted my nextcloud installation. I wanted to move the data files that constitute my nextcloud storage to the much roomier RAID+LVM on the KVM host itself.
There was suffice to say, a lot of flaffing about before I managed to get it to work. The screenshot below shows the configuration in virt-manager.
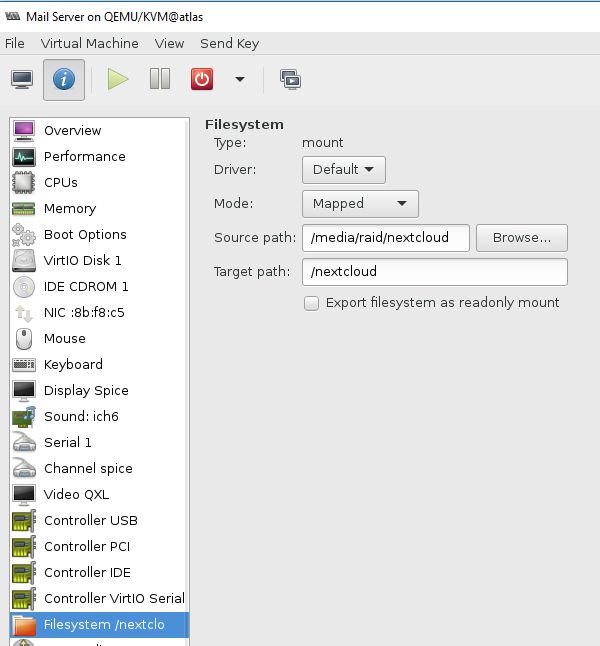
What it does not show are the file permissions on the KVM host. The directory has the permissions of:
ls -l
drwxr-xr-x 3 libvirt-qemu kvm 18 Jan 1 09:44 nextcloud
This is because in ‘mapped’ mode “files are created with Qemu user credentials and the client-user’s credentials are saved in extended attributes.” Whereby client-user is referring to users on the VM. Once mounted on the guest OS with:
sudo mount -t 9p -o trans=virtio,version=9p2000.L /nextcloud /nextcloud/
I was about to copy in the data directory (when apache2 was off) preserving the ownership and permissions of the files.
On the host OS, the files all appear to be owned by libvert-qemu and kvm, on the guest OS they all appear to be owned by the www-data user. The final step is of course to make the changes persistant by editing the /ect/fstab file and adding the in the line:
/nextcloud /nextcloud 9p trans=virtio,version=9p2000.L 0 0
 convenient services, the true cost is to your privacy and security. Having some technical knowledge means that I can have the convenience and features of their platforms without having to sacrifice any of the above – it’s the best of both worlds!